
Cleaning & sterilisation for small-scale beekeepers – Part three – Wax & Frame Recovery
This is the last blog in a series of three, which together aim to show a simple setup and methods for the cleaning & sterilisation of equipment, for use by small-scale beekeepers. The focus of this blog is the recovery of wax and frames.
Click here to go back to the first blog in the cleaning and sterilisation series. “Part One – Equipment”. Click here to go back to the second blog in the cleaning and sterilisation series. “Part Two – Assessing brood frames”.

Recovering frames using boiling cleaning soda solution
Submerging frames in a boiling cleaning soda solution for two minutes is a cleaning, as well as a sterilisation process, against chalkbrood and nosema. Cleaning soda is a skin irritant and the water is boiling, so I wear marigolds and eye protection. The boiling solution produces a vapour which I avoid breathing in, using an extractor. Like the ones used in bathrooms and kitchens.
Equipment and materials
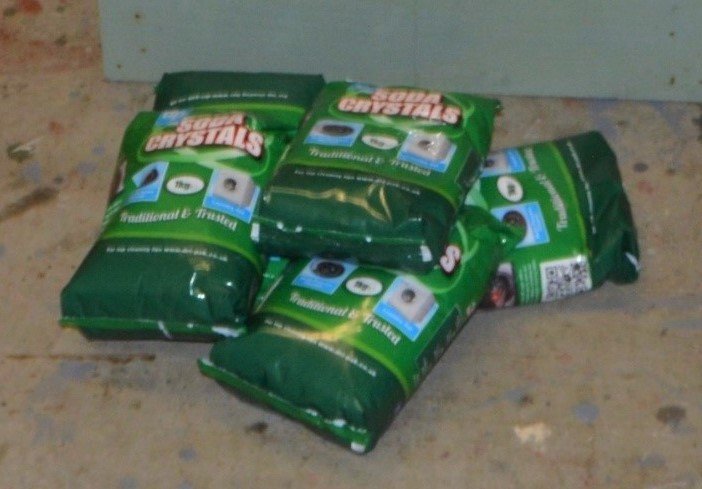
The cleaning soda (sodium carbonate) is readily available at supermarkets and discount stores. Often for less than £1 per kg. The solution is 1:5 cleaning soda to clean water. I add 5kg of cleaning soda to 25L of water in the water boiler.
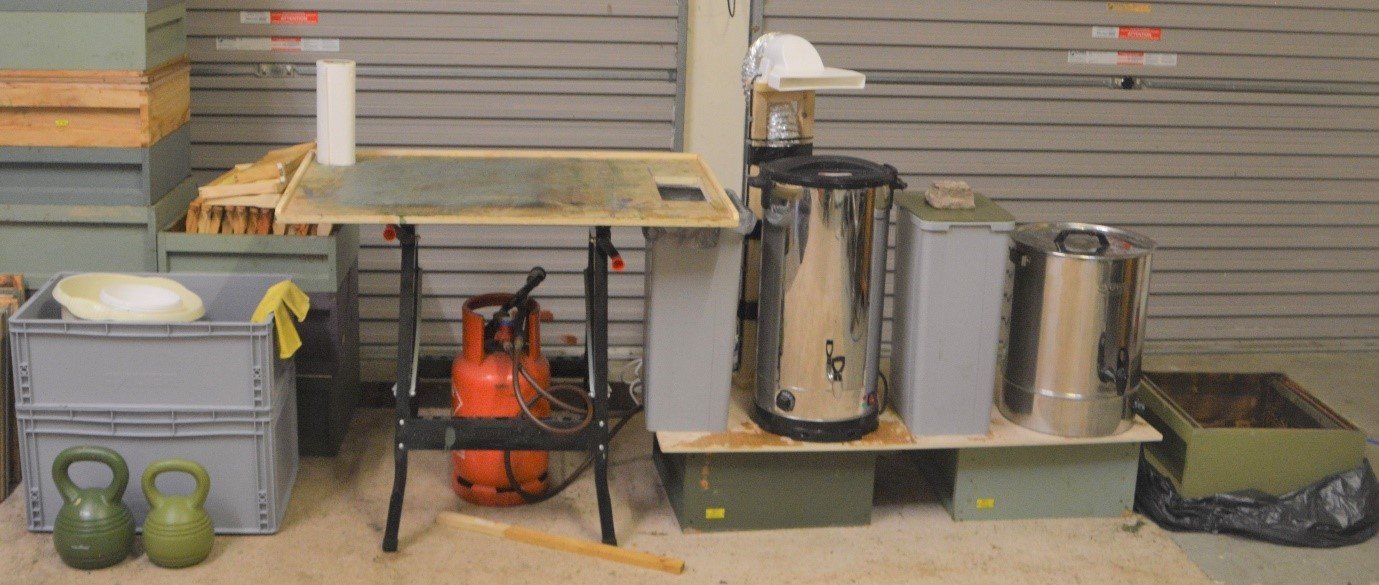
When I had fewer hives, I used my Burco boiler for sterilising frames and recovering wax. The Burco is not tall enough to submerge national frames. This meant that frames were double handled to dip both ends, and it could not be used at the same time for wax recovery. After much searching, I found the boiler below on Amazon. It can take 6 national brood frames, fully submerged and has temperature control up to 110 degree C.
Submerge in boiling cleaning soda solution
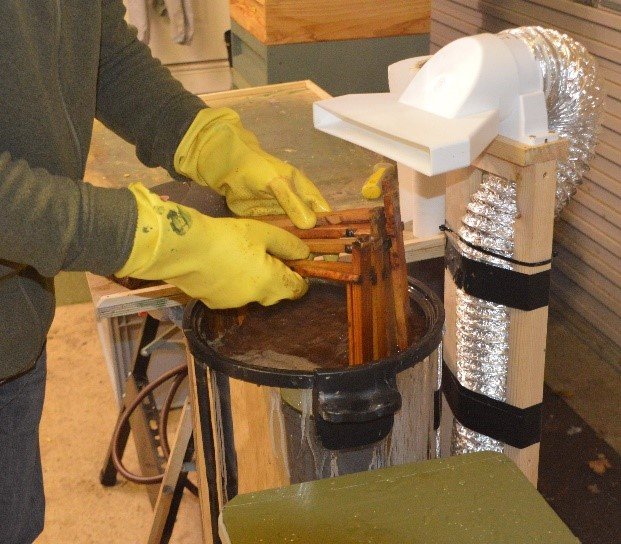
After six frames have been scraped, to remove as much of the wax and propolis as possible, they are bundled together with string or tie-wraps. The bundle is submerged in the boiling solution and held down with a piece of stone cobble.
After two minutes, the frames are removed, with some vigorous sloshing. Most of the time the frames come out with all the propolis removed but occasionally it may need some encouragement with a piece of Scotchbrite and then more sloshing. After a few batches the mixture will turn from the nice white solution it started as, to a mucky brown colour. This is just the boiling cleaning soda solution doing its job, of cleaning frames, by dissolving the propolis and wax, from the frames.
Rinse in clean water
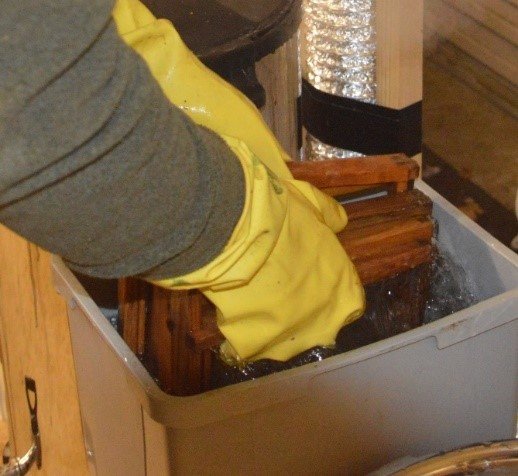
The bundle of frames is then submerged in a tall bin of clean water and sloshed repeatedly, to remove the cleaning soda solution from the surface of the frames. This water can quickly become discoloured and I replace this water after a few bundles to keep it clean.
Dry thoroughly

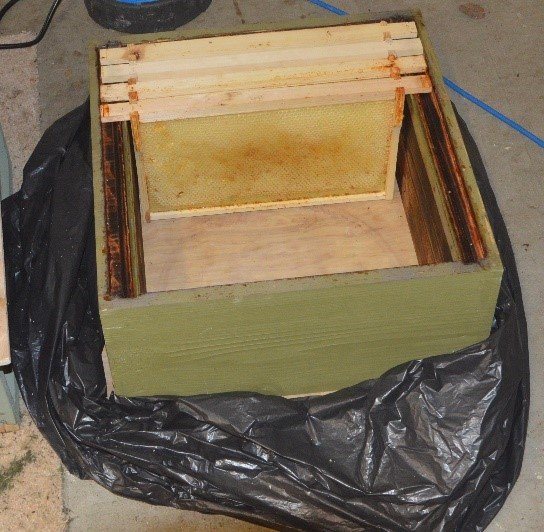
The bundles of frames are then left on the floor to drip dry. Once they are drip dry, they are put in a warm place to fully dry out. They are stored in empty cleaned and sterilised brood boxes, once completely dry. Fresh wax is put into these frames just before they are needed.
Recovering wax using a Burco boiler setup as a Bain-Marie
This is simply a recovery process. It does not remove all the debris from the wax and the temperatures involved are not high enough to guarantee destruction of the spores of the key honeybee pathogens. However, it does produce nice discs of wax which can be refined later to make wax based products, or used in a wax exchange scheme, like the Thorn’s one.
Wax processing equipment
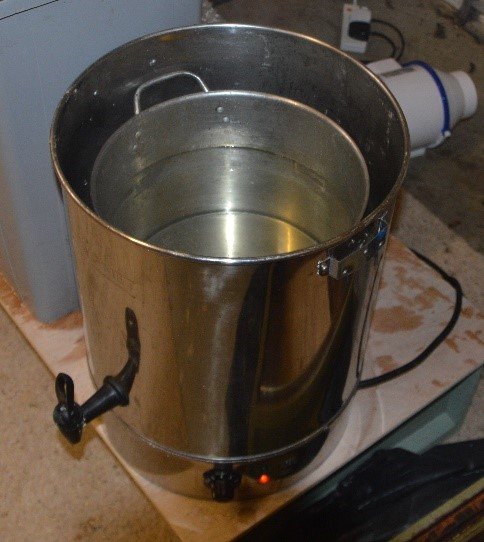
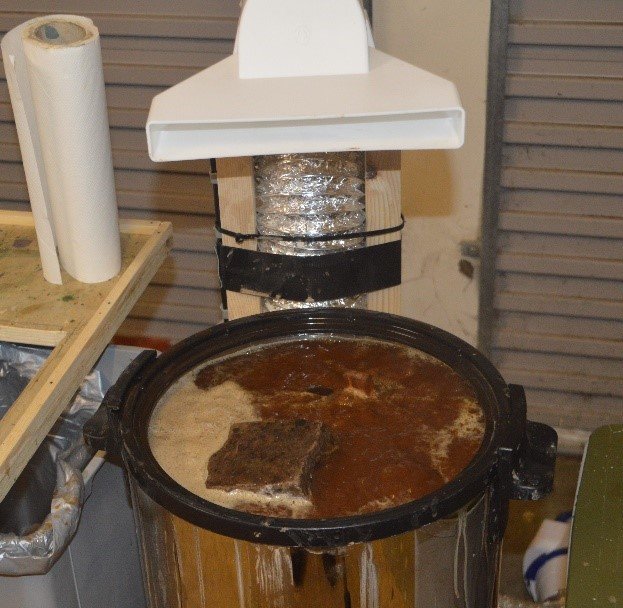
The bain-marie set up, consists of a burco boiler, with a circular cake stand in the bottom. This provides a 20mm gap between the heated base and the bottom of the stock pot, which sits inside the boiler. Both the boiler and the stock pot are two-thirds full of clean water. The stock pot needs slightly more water to avoid it from floating off the cake stand. The thermostat is set to 75 to 80 Degree C and the lids of the stock pot and burco are kept in place. The lids are only removed to add wax.
Melting the wax
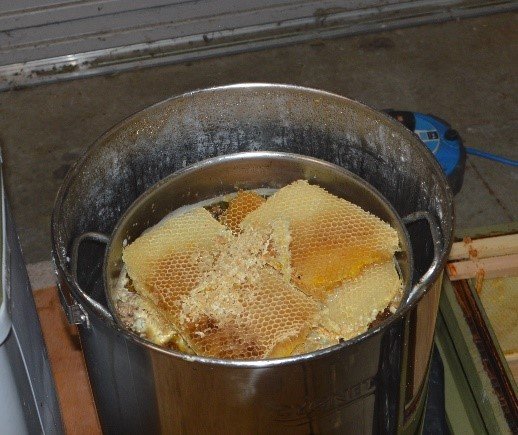
When comb for recovery has been cut out of its frame, it is broken up and put into the stock pot. It will slowly melt. This will leave the floating debris on the surface, the soluble debris in the water, the heavy debris on the bottom of the stock pot and some debris between the water and wax.
Removing surface debris
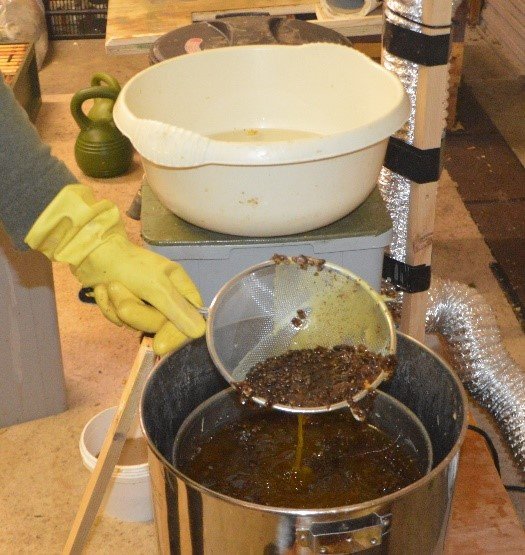
At the end of the session a small sieve is used to scoop out the cell cases and surface debris. A lot of wax can be removed from this debris while the wax is still molten, using a chef-style stir-fry motion over the stock pot. The ball of debris left in the sieve is then tipped into a bowl of water. I put these in with the waste to be burned.
The boiler is then switched off and the lids are replaced. It is then left overnight to cool slowly.
Cleaning the wax
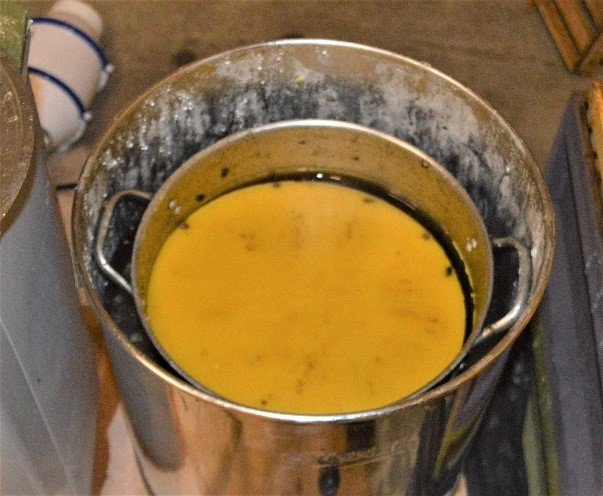
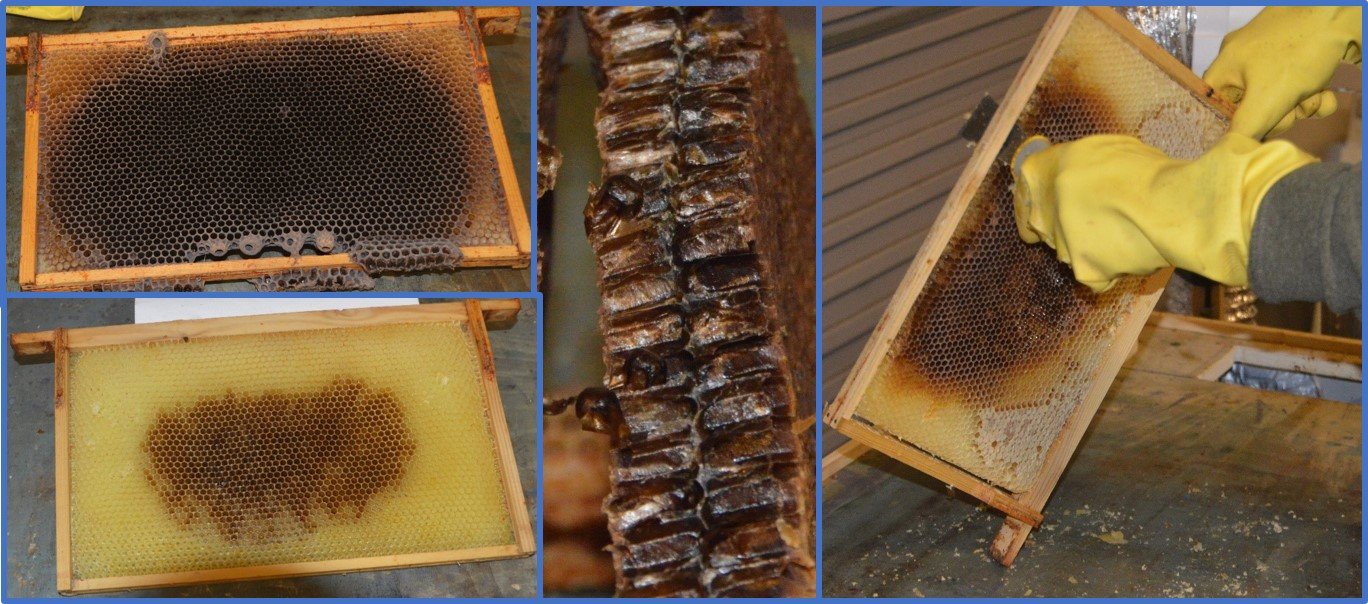
The next morning the wax will have set and has normally shrunk back from the sides. This leaves a nice disc of wax floating in the water, which can be simply lifted out.
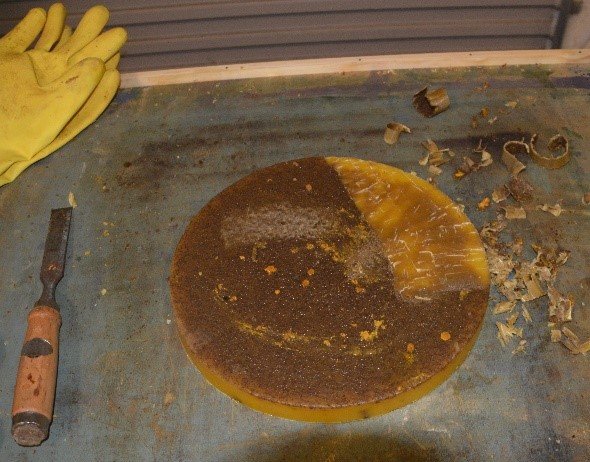
The underside of the disc usually has a layer of foam-like debris. This can be scraped off using a wallpaper scraper, chisel or hive tool.

At the end of the process you are rewarded with a nice disc of recovered wax, but don’t expect a lot! I normally get 2 to 3 kg per season, but I’m selective about which wax to recover.
The decision to sterilise frames using 80% Acetic acid
80% acetic acid is a dangerous substance. It dissolves concrete, steel and human skin on contact. The vapour is colourless but can damage the lungs, if inhaled. It is harmful, if swallowed. It is also flammable and can even be explosive in the right conditions! Click here for a safety data sheet for 80% acetic acid.
The good news is that it is great at killing many of the common pathogens, although the National Bee Unit state that there is no evidence that it is suitable against AFB and EFB. It is easy to obtain online and having a supply of sterilised drawn comb can be a big boost to your colonies. But, as a small-scale beekeeper, you need to decide if these benefits are worth the risks involved with handling such a dangerous substance. Just having it in your house is a hazard and it is something that should be in a locked chemical cupboard not just kept under the kitchen sink.
When I sterilise with 80% acetic acid, I follow some simple rules
- It’s done in a well-ventilated area, where it won’t be disturbed by people, particularly children or animals (wild or pets)
- I try to buy what I need and use it, but store it under lock and key, when neccesary.
- I follow the same process each time and leave it in a well-ventilated place, where it won’t be disturbed by people or animals.
- Full specification personal safety equipment is worn, safe working practices are followed and the amount of time the top is off the bottle is kept to a minimum.
Here is the safety equipment I use when handling 80% acetic acid: –
- Acid proof rubber gloves
- Full face mask with filters for use with acetic acid vapour
- Wellies and protective clothing
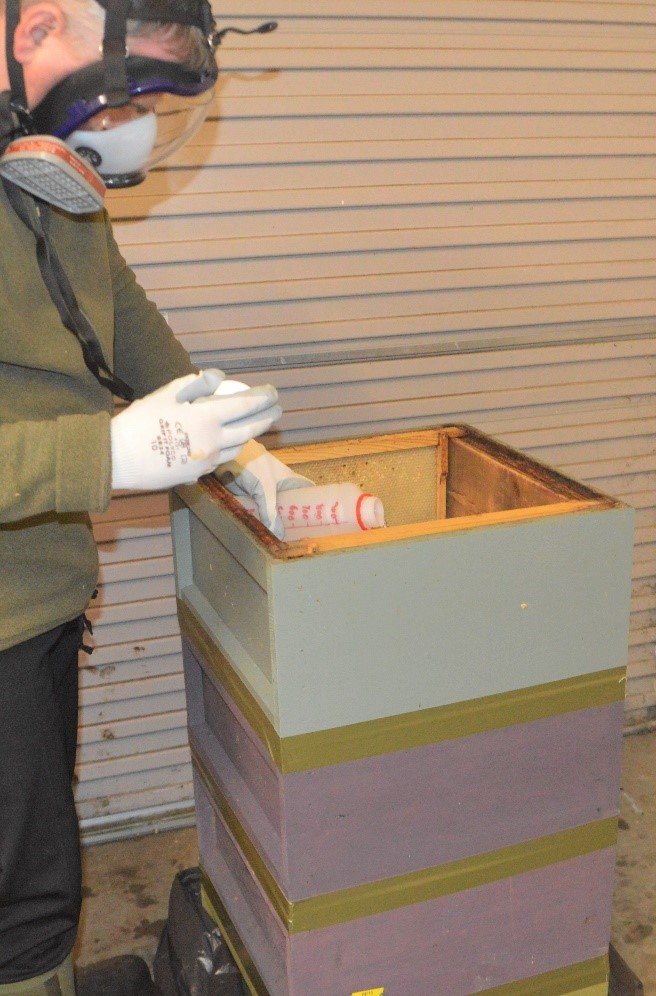
How to treat frames with 80% acetic acid
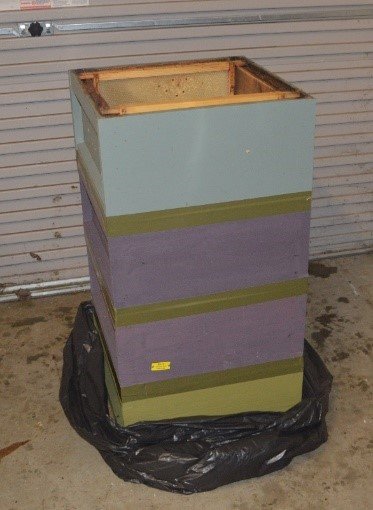
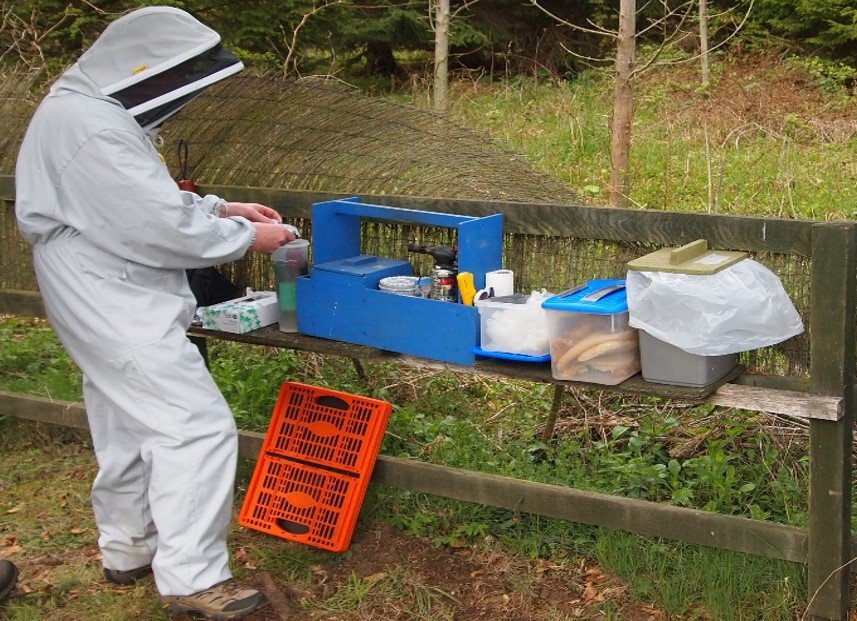
The frames for treatment with 80% acetic acid are collected in an empty brood body. This brood body sits on a 500mm x 500mm piece of plywood, inside the base of a wheelie bin liner. As the brood body becomes full, further brood bodies are stacked on top, to take more frames.
At the end of the session, an empty brood body is placed on top of the stack. Then the joints between the brood boxes are covered over with masking tape, to retain the vapour inside the brood bodies.
An acid proof tray or dish is placed on top of the frames. In this dish, but draped over the edges, is an absorbent cloth.
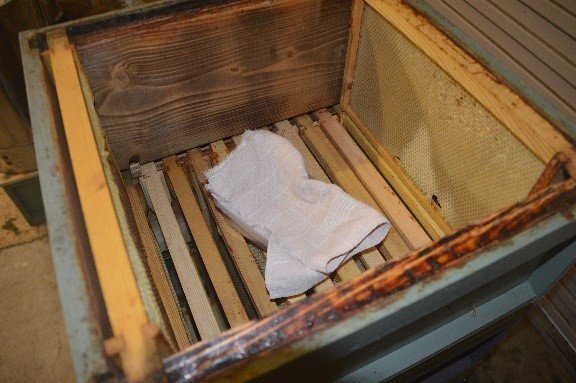
The next stage is when all the safety equipment is put on and it gets serious. The National Bee Unit guidance is for 120 ml of 80% acetic acid per brood box full of frames. With all the safety equipment and precautions in place, the 80% acetic acid is poured onto the cloth in the dish.
The top is put back on the bottle, and with the safety equipment still on, a Perspex crown board is placed over the top and sealed with masking tape into position.
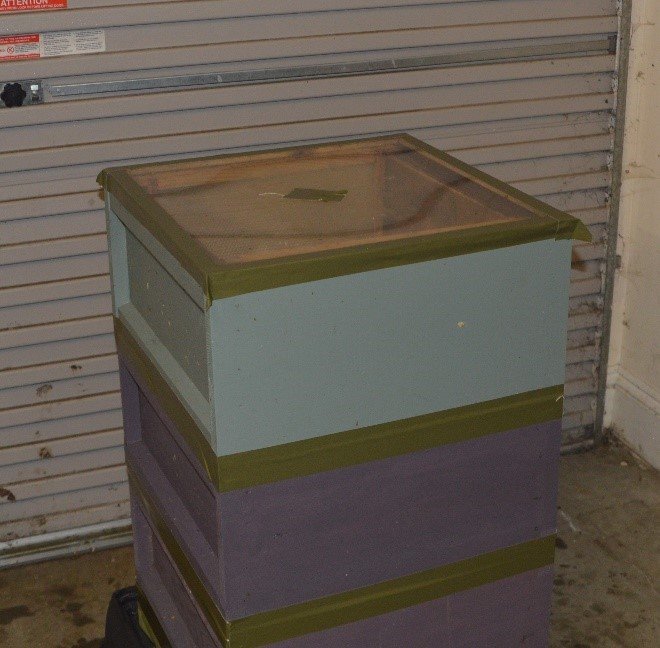
The wheelie bin liner is pulled up over the brood boxes and taped into position onto the crown board.
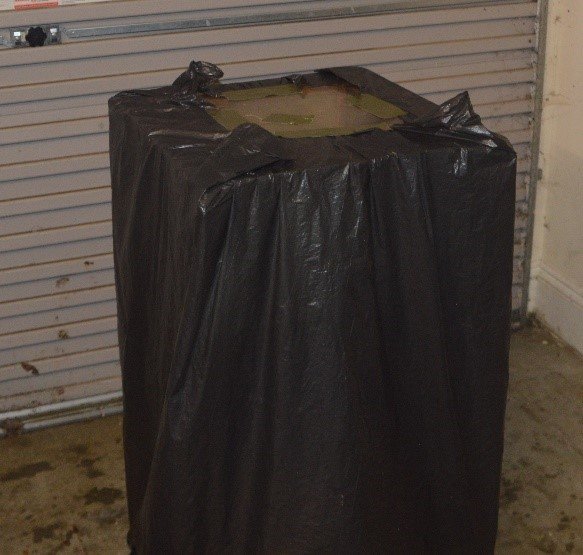
A roof is then put in position. The whole set up is left for a week or more until the 80% acetic acid has evaporated and done its work. How long the evaporation takes will depend on the ambient temperature.
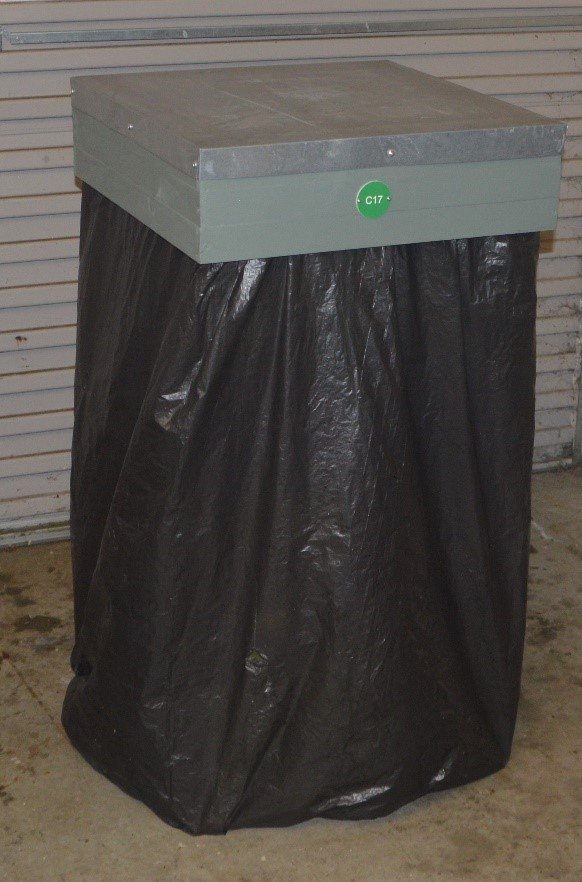
The Perspex crown board allows periodic inspection, to see if the 80% acetic acid has evaporated. When the process is complete the setup is dismantled again, wearing the safety equipment. It is then allowed to air in a well-ventilated area, away from people and animals, for a few days before using them.
Summary – Part 3 – Recovering Wax & Frames
This blog is the last in a series of three and describes simple methods of recovering wax and frames, which can be used by small-scale beekeepers.
Click here to go back to the first blog in the cleaning and sterilisation series. “Part One – Equipment”. Click here to go back to the second blog in the cleaning and sterilisation series. “Part Two – Assessing brood frames”.
I use this approach to cleaning and sterilisation of hive frames and equipment as part of an integrated approach to keeping healthy bees, by regularly removing darkened comb and providing clean comb on which they can raise their brood.
Although it is not the most exciting part of the beekeeping year, a good cleaning and sterilisation regime can make a big difference to the success of the coming season.
I’m not promising that this approach will make it any more exciting, but you will get through it faster and easier, with a bit less mess!
If you have found this useful please share with others who will be interested. If you would like to receive future posts, please subscribe on the homepage.
Hi Ian
Very clear and concise. I bet Thornes love you. Most of the wax they get back is horrible. Have you ever thought about producing your own foundation from the nice wax that you recover ?
Completely agree