Transfer of first grafted queen cells of the season into apidea mating hives
After grafting larvae into cups ten days ago, the ripe queen cells were put into apidea mating hives today.
I have become a fan of putting ripe queen cells into Apidea mating hives and had a lot of success with them last season. The Apidea mating hives themselves are well designed, robust and thought through pieces of equipment. Queens that emerge in them appear to get mated quickly and they use only a small amount of apiary resources. Basically, a cup full of bees, a piece of fondant and a little wax foundation.
The aim of this blog is to show the process I went through to take the ripe queen cells and put them into Apideas.
I started ten days ago, when I grafted young larvae into jzbz cups fitted into a frame. This frame was placed into a strong colony which had become queen-less. My success rate was not fantastic at six out of twenty, but I was happy with this for my first graft of the season. After I had removed these ripe cells I grafted more larvae into the remaining cups. We will see how many of them I get in another ten days!
This just shows that as a small-scale beekeeper, you don’t even need much equipment or to be very good at grafting, to give yourself a good supply of new queens and lots of options in the apiary later in the season.
Taking out the ripe cells
I’d love to show a picture of me holding a grafting frame with 20 out of 20 ripe queen cells, although I don’t know what I would have done with 20 queen cells! Here is my grafting frame.
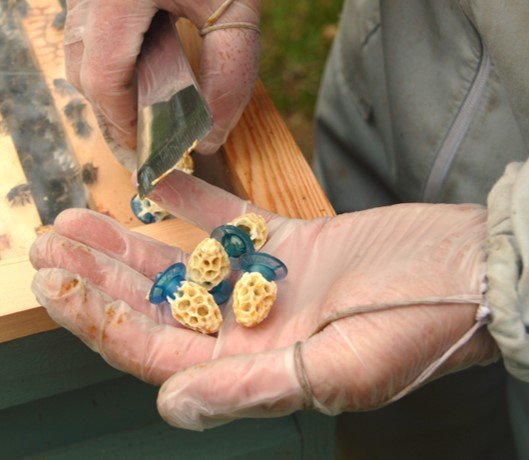
The frame was removed from its place in the middle of the colony and placed on top of the brood body, on the frames. I carefully prised the ripe cells from the bars and placed them to one side. The frame was then placed back in the hive. I would use this frame to graft into later so wanted to keep its hive smell and temperature.
The result was a handful of ripe queen cells.

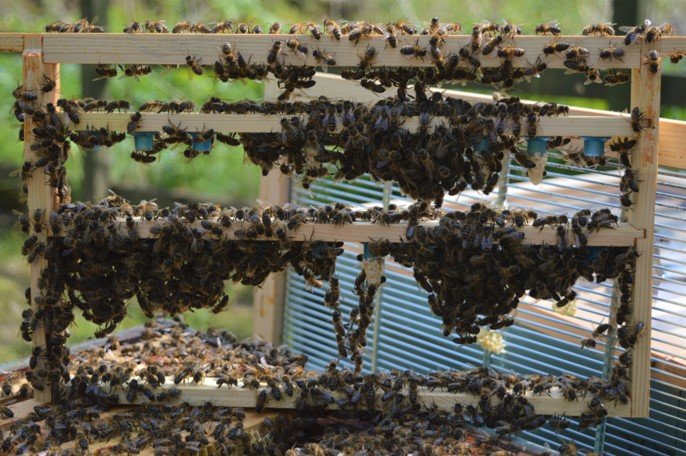
Setting up the apideas
Previously I had prepared the apideas for filling. This involves putting a small piece of foundation on each of the little frames and “waxing” it into place with a dribble of molten wax. A piece of fondant is also prepared by wrapping it in cling film and putting it into the feeder.
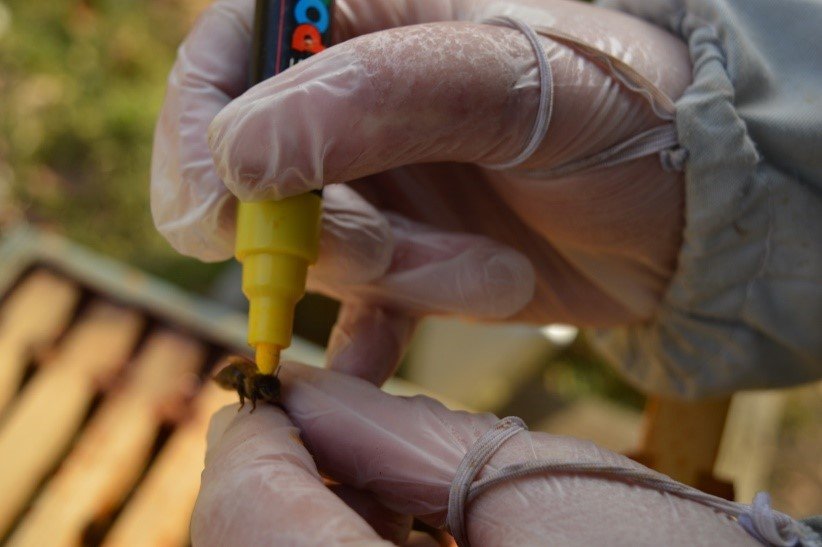
On the day the apideas were filled, I started by laying them out, in a quiet area in the apiary. The queen cells were then passed through the round space between two frames and then slid along between the frames, so the flange at the top of the cup is above the frame bar but the cell is below.
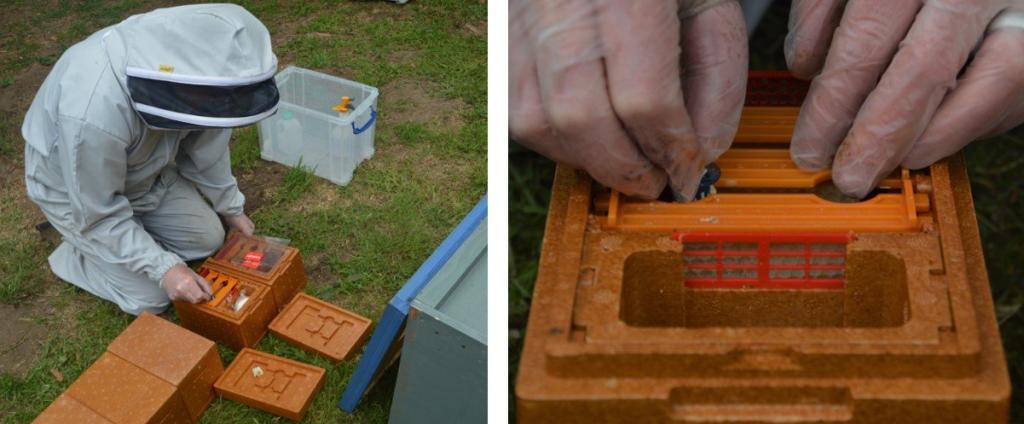
The cling film is removed from the fondant! The clear crown board and roof are put on. Then they are turned upside down and the floor is slid to the open position.
Filling the apideas with bees
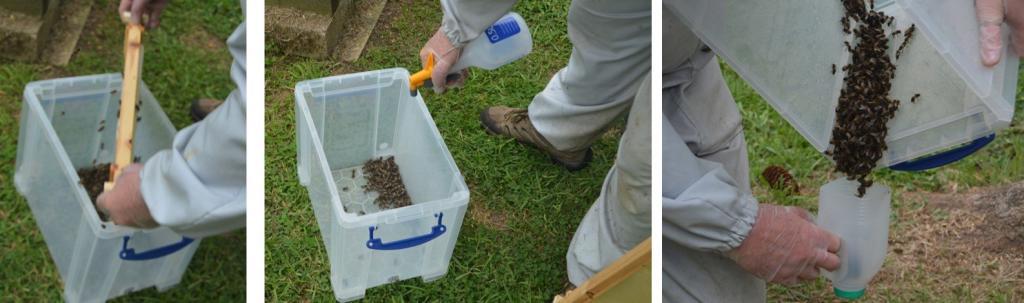
The next stage is to collect some bees. I take bees from the supers. This allows you to get to frames of bees of about the right age, quickly, without needing to worry about the queen or taking drones.
How exciting this gets will depend on how defensive the particular colony is! A frame of bees is taken and shaken into a suitable box. I find a “19L Really Useful Box” ideal for this. A cheap plant sprayer full of water is used to wet the bees in the box. This stops them from flying and makes them “clump” together.
The bees are then “poured” from the box into a cup. A cut down milk carton is ideal for this. I find pouring them rather than scooping them causes much less damage to the bees.
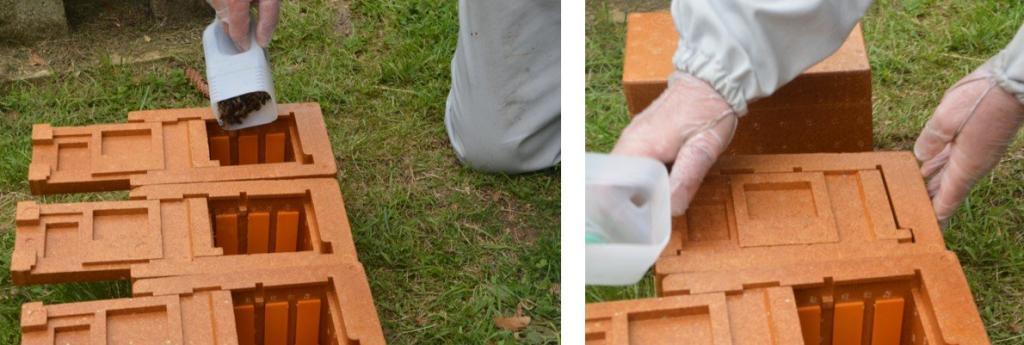
The cup full of bees is then put into the up turned Apidea. It’s a bit more of a “throw” than a “pour” into the Apidea but not too harsh. The floor is then quickly closed, all in one smooth flowing motion!
How long before I have a laying queen?
The filled Apideas are put in a cool and dark place for a couple of days, like a garage. The bees will “roar” and “click” for a couple of days, while they produce wax and create the conditions they need in the new nest.
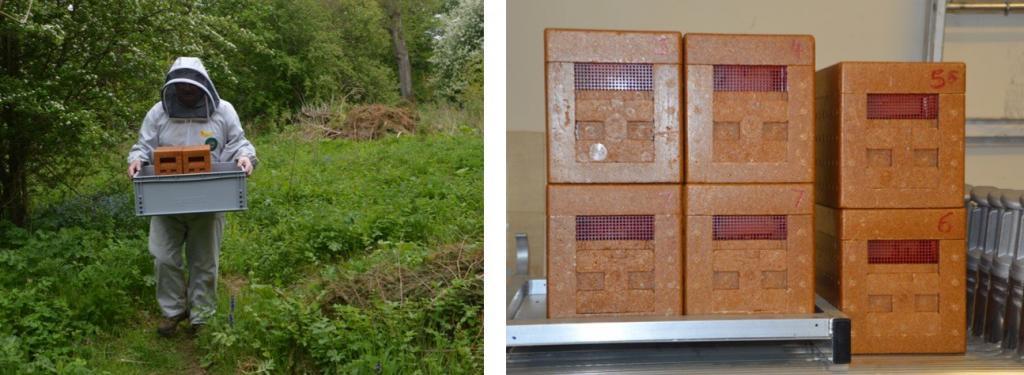
If it has been timed right, the queen will emerge within a couple of days. The bees will stop roaring at this stage, which very conveniently tells you that she emerged. The Apidea is then placed outside. This can be on a small platform on a post or bungeed to a fence rail.
The front of the Apidea is then slid up halfway. This still allows ventilation but reveals the little doorway. The queen excluder is slid across the doorway to prevent the queen leaving.
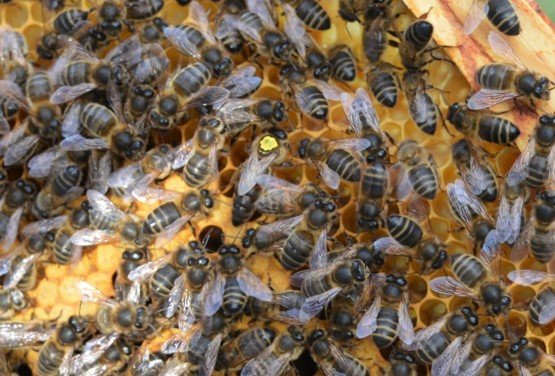
It will take six days or so, for the queen to become sexually mature. At this point slide back, the little queen excluder. Mating is then weather dependant. Here in rural Northumberland, my queens appear to mate when the weather is 18 deg C or above, with light winds. Which is not every day! She has about a four-week window to mate before biological changes take place which prevent her from mating successfully, but it could be as early as the first day of sexual maturity.
Once she has mated the queen needs a couple of days to fill her spermatheca and will then start to lay eggs. So, it can take anything between a week and a month from her emerging before you will see eggs.
Summary
I have become a fan of putting ripe queen cells into Apidea mating hives, because they use only a small amount of apiary resources and are well designed. They are part of my approach to bee breeding.
To produce these queen cells, I grafted into jzbz cups, but it would have been just as easy to take six good swarm cells from a colony during swarm control measures.
This just shows that as a small-scale beekeeper, you don’t even need much equipment or to be very good at grafting, or even graft at all, to give yourself a good supply of new queens and lots of options in the apiary later in the season.
If you have found this interesting or helpful, please subscribe to my blog, or like/share on Facebook.