Simple wax processing for a small-scale beekeeper
In this blog I would like to describe a simple method of wax processing for a small-scale beekeeper. This will enable you to turn the wax you have collected during the season into cleaned and filtered wax, ready to make into candles, food wraps, cosmetics, polish or foundation.
What equipment is required for wax processing?
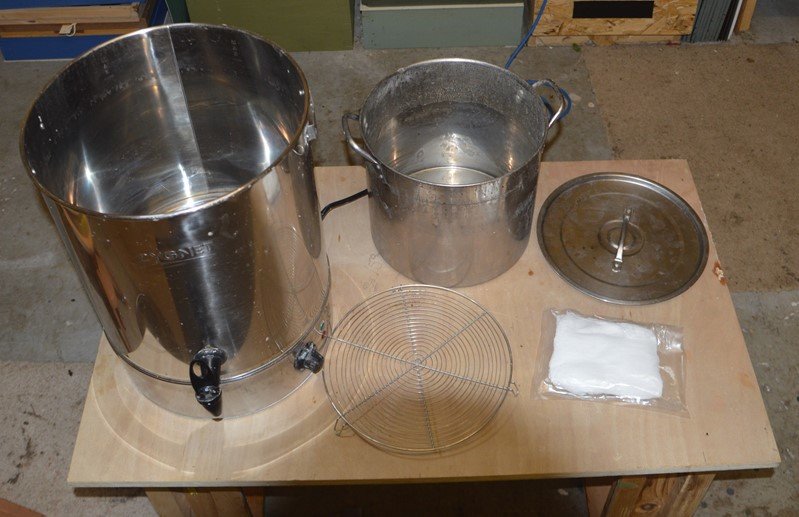
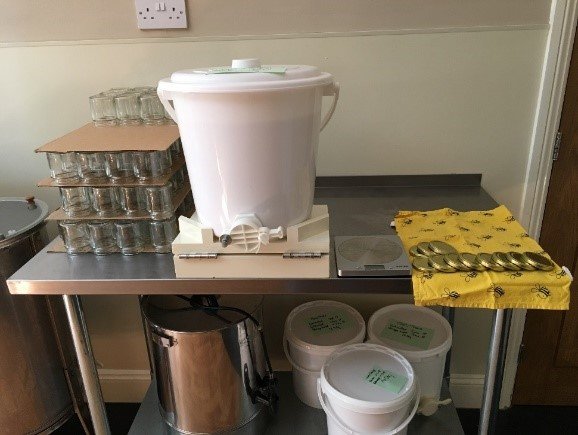
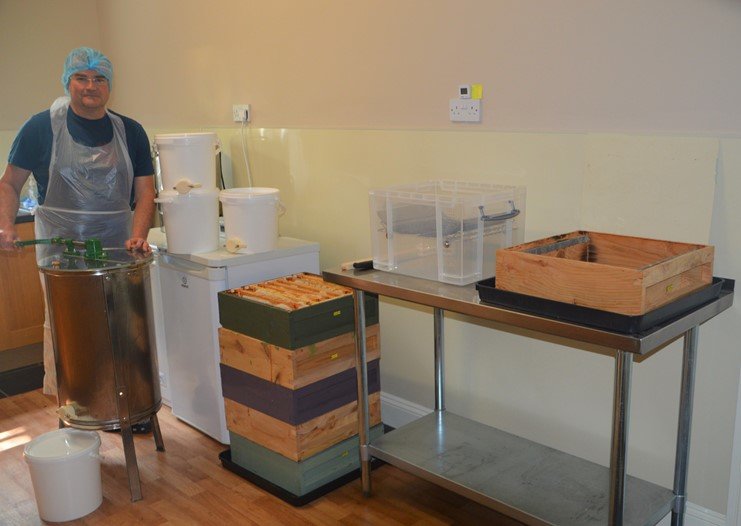
Here is the equipment I use to process wax collected during the season. The set up includes: –
- My trusty 30 Ltr Burco boiler. (I also use it to sterilise frames with cleaning soda)
- A 15ltr stock pot fits perfectly inside the Burco boiler, which I bought from Amazon.
- A circular cake stand, which ensures the stock pot is held off the bottom of the Burco boiler.
- A pack of muslin bags. I’ve used charity pillow cases, hessian sacks and dish cloths as filters but find the pre-made muslin bags, used for homebrew, work well.
Where does the wax come from?
Most of the wax comes from the cappings collected during the honey extraction process. Click here to read my post about uncapping during honey processing. The brace comb collected from the apiary during the season is also usually quite clean and light in colour.
Wax from brood frames may have a build-up of contamination and will also be darker when processed. So, I sort through the wax that is recovered from cleaning up brood frames and make a judgement call about what is worth recovering and what to burn.
How is the wax processed?
Stage 1 – bag the wax
The first stage is to get the wax you want to process into a muslin bag and put a knot in the top.

Stage 2 – set up the boiler
The next step is to fill the Burco boiler about one third full of water, put the cake stand in the bottom and fill the stock pot about two thirds full of water. You want the stock pot to “sink” into the water in the boiler and lightly rest on the cake stand in the bottom. It is ideal of you can get the water level in the boiler to the same as the level in the stock pot.
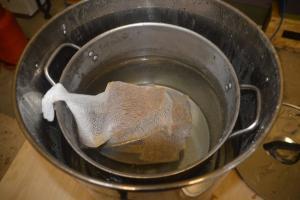
Put the muslin bag into the water, with the knot over the rim of the stock pot. Put the lid on the stock pot, so it traps the knot of the muslin bag and put on the boiler lid.

Stage 3 – melt the wax
The melting point of wax is approximately 63 Degree C. Wax starts to be discoloured and damaged if the temperature is allowed to get too high. Yates & Yates quote 90 Degree C as a maximum in their book “Beekeeping Study Notes“. In my Burco boiler user guide, it claims that the water temperature reaches 82 Degree C when the temperature dial is set to “4”.
With the stock pot and Burco boiler lids on and the dial set to 4, the boiler is turned on and left to heat up. Within half and hour or so everything is up to temperature and the wax has usually melted.
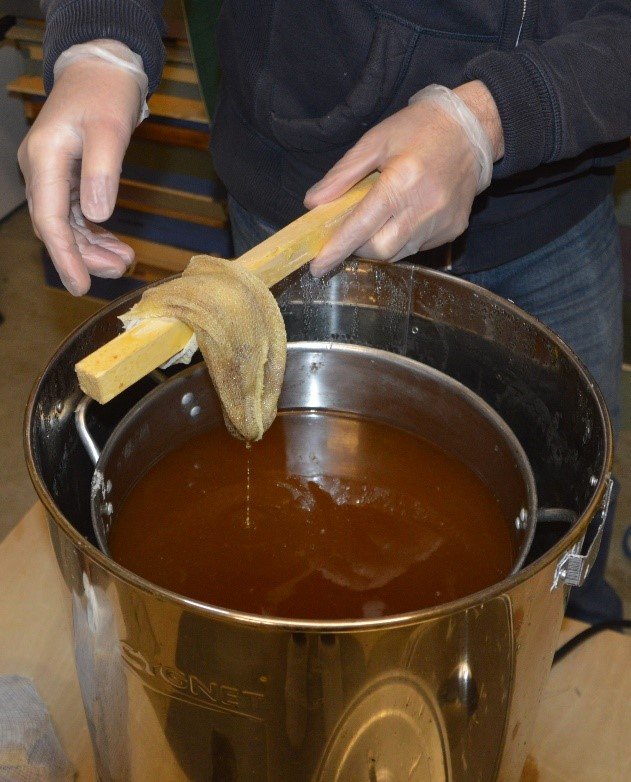
Stage 4 – remove the bag
Carefully lift the muslin bag out of the stockpot and allow the remaining wax to drain from it, disturbing the wax as little as possible.
The cleaning and filtering process works by removing impurities in a number of ways.
- Larger debris is filtered out when the muslin bag it is taken out
- The heavy, small particles sink to the bottom of the stock pot.
- Dissolvable impurities are suspended in the water.
- Some impurities accumulate on the bottom of the wax and can be scrapped off when set.
Stage 5 – cool slowly
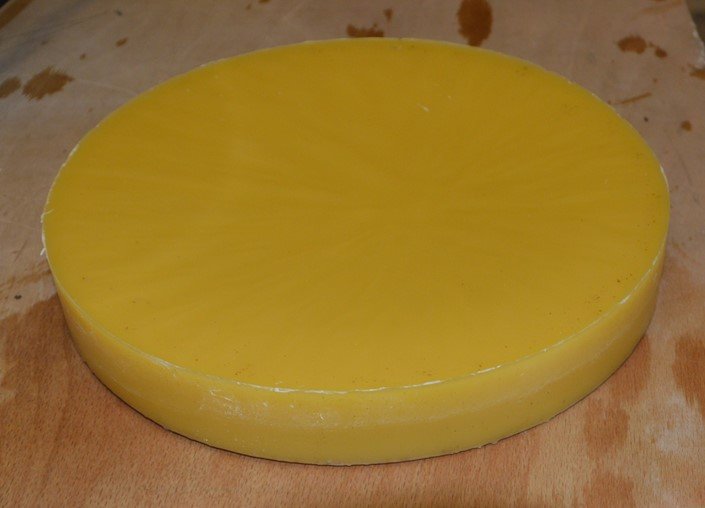
The boiler is then switched off and allowed to cool slowly overnight. The slower the better. The next day you should find a lovely disc of wax floating in the top of the stock pot, that looks something like this.
This one was made from the cappings produced from my honey processing this season. Its almost 40mm thick and weighs 1.8kg.
Summary – Simple Wax Processing
With some simple equipment a small-scale keeper can process wax in a simple and effective way. The key items of equipment that I use are a 30Ltr Burco boiler, a 15ltr stock pot, a cake stand and some muslin bags.
The wax recovered from honey cappings and from brace comb is cleaner and lighter in colour but don’t expect to recover large quantities from a few hives. You will appreciate how precious wax is to the colony and get a great sense of satisfaction when you use your wax to make queen cups, food wraps, polish, lip balm or candles.
You could also have a go at producing your own foundation. Buying a foundation press or die set may be beyond the budget of the small-scale beekeeper but Thorne’s are advertising some silicone foundation moulds for £40, which use about 750g of wax to produce 10 sheets of national deep foundation.
You could always trade it in for new foundation as part of Thorne’s wax conversion scheme, but where is the fun in that !?
If you have found this interesting please subscribe to my blog and/or share on Facebook.
Brillian How to Ian. I notice others do it outside, is this because of a smell or mess?
Thanks. There is just a nice wax smell and the temperatures involved don’t produce steam. The Burco is electric and I’m in my garage. Are the other you have seen using gaz or wood fires?
Lovely looking wax Ian
Hi Ian. Just found your blog. Great explanation and very clear – and the wax looks great too. One question – do you re-use the muslin bags and, if so, how do you clean them/prepare for the next melting. Or do you just use several times and then bin?