
Cleaning & sterilisation for small-scale beekeepers – Part One – Equipment
Although it is not the most exciting part of the beekeeping year, a good cleaning and sterilisation regime can make a big difference to the success of the following season.
This series of blogs describes a simple setup and methods for cleaning and sterilising beekeeping equipment, using hardware and chemicals that are readily available to small-scale beekeepers, with between approximately five and thirty hives.
This first blog, of three, covers the setup of equipment, as well as cleaning and sterilising brood bodies and polystyrene nucs.
The National Bee Unit “Cleaning & Sterilisation” leaflet is used as a base for the methods described in this blog. Download it by clicking here.
What equipment do I use for cleaning and sterilising?
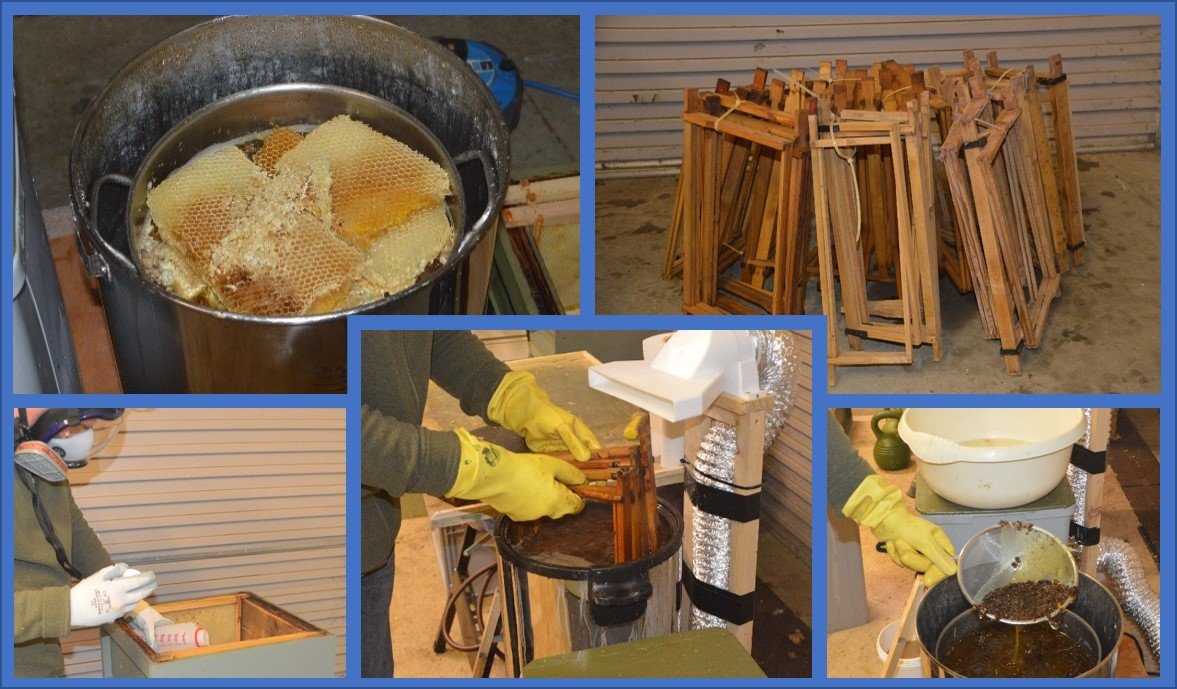
Working through the hive parts, nuc boxes and frames at the end of a season is messy and hard work. I wanted to come up with a setup that would enable me to get through all of my end of season cleaning & sterilisation tasks in a single weekend session. This involved arranging the equipment to minimise handling of equipment, quickly containing high risk comb, allowing for as much concurrent activity as possible and allowing the work to be done at a comfortable height.
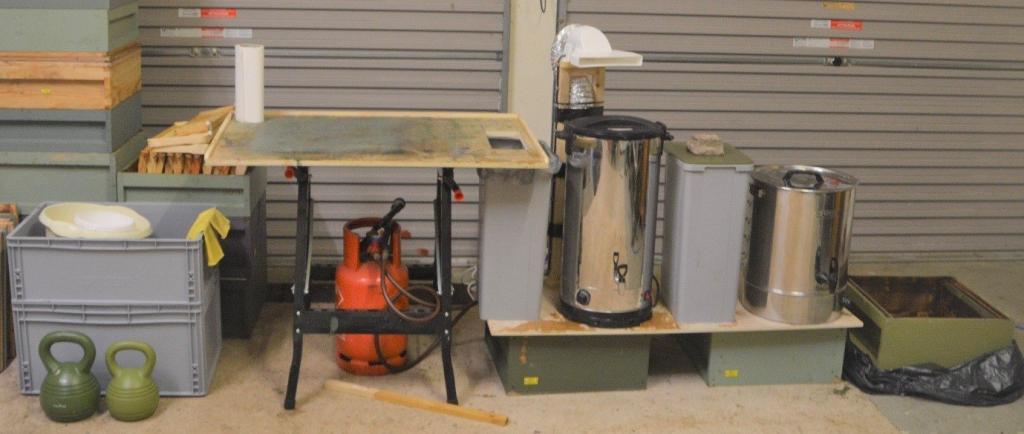
The photo above shows the set up that I use for cleaning and sterilisation of equipment.
From left to right are: –
- Plastic crate – containing a solution of diluted bleach solution for sterilisation of polystyrene nucs and hive parts. Complete with weights to keep them submerged.
- Blow torch – propane cylinder, regulator, hose and torch. The blowtorch kit was from Amazon.
- Cleaning table – A simple plywood working surface clamped to a work bench. I bought this from the middle isle of Lidl. The worksurface has a beading edge and a hole, through which debris can be scraped into the bin below.
- Bin – lined with a polythene bin liner.
- Tall water boiler – containing a 1:5 ratio of cleaning soda and water. Tall enough to accommodate brood frames and fully submerge them in the solution. This was on offer on Amazon.
- Rinse bin – containing clean water and tall enough to rinse cleaning soda solution from brood frames from the water boiler.
- Burco Boiler – set up as a bain-marie, containing a stock pot supported on a metal cake stand, with both two-thirds full of water. This will be used to recover wax. Burco boiler & stock pot were from Amazon.
- Brood body – set up on a plywood base, inside a wheelie bin liner. This will be used to collect frames for sterilisation using 80% acetic acid.
- Extractor – above the cleaning soda boiler I have an extractor to take away the vapour from the cleaning soda water boiler.
What is the difference between cleaning and sterilisation?
Cleaning involves the removal of debris by physical or chemical means, which could harbour, attract or feed pests and disease. Sterilisation involves killing any pests or disease which are still be present after cleaning. Some processes achieve both, but it is important to recognise those which only do one or the other.
Cleaning polystyrene hives
As the frames are removed from my polystyrene nuc boxes and become empty, they are first put on the cleaning table and as much of the physical wax and propolis debris is removed carefully with a narrow wallpaper scraper.
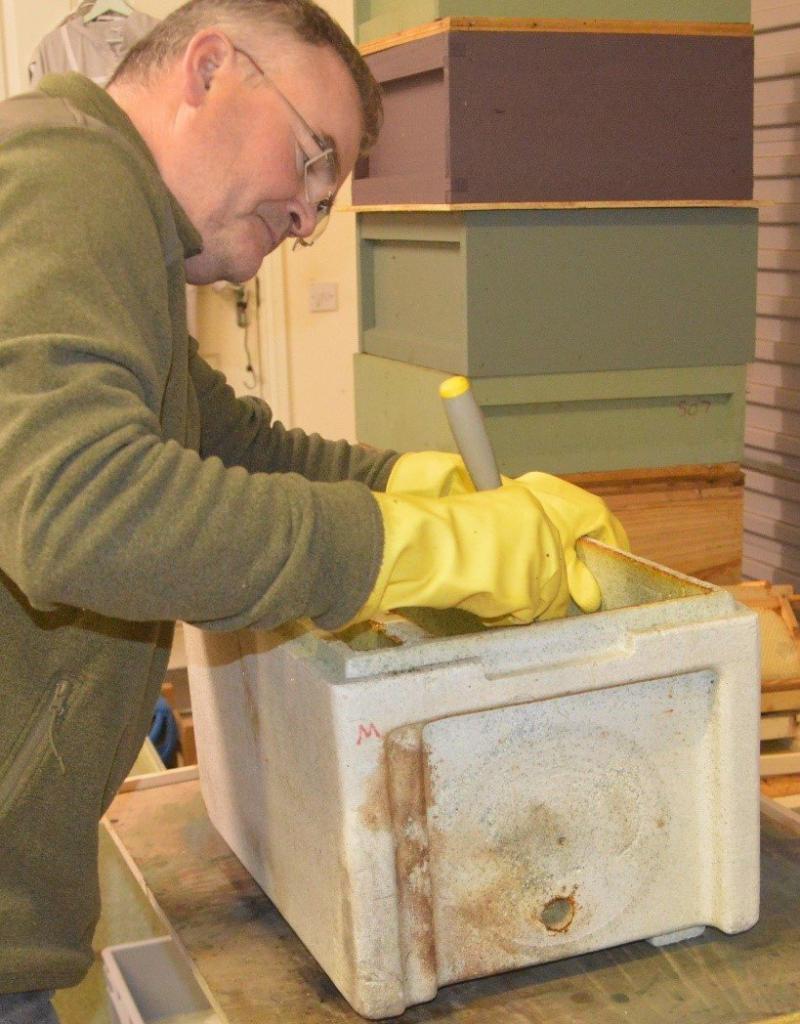
The wooden float from the built-in feeder is recycled in my kindling box and I make a new one from 1cm square strip wood. The float gets impregnated with sugar syrup during the season and can become a great place for mould to grow over winter. They are replaced each year.
The plastic entrance disc is removed for cleaning. They get dipped in the boiling cleaning soda solution for a couple of minutes, then are scrubbed and rinsed in cold water.
The polycarbonate crown board sheet is scraped clean. After scraping, the main body and the roof, can be lightly jet washed to remove external grime. Powerful jet washers are more than capable of blasting holes in the polystyrene, so I take care to remove the grime, without damaging the hives.
Sterilising Polystyrene hives
After cleaning the next step is to sterilise it in the tub of bleach solution. I bought this 60L tub from Amazon. It has blanked off handle holes. There is also a lid available, but I use a shallower tub as a lid. This is also handy for storing tools and other bits and pieces.
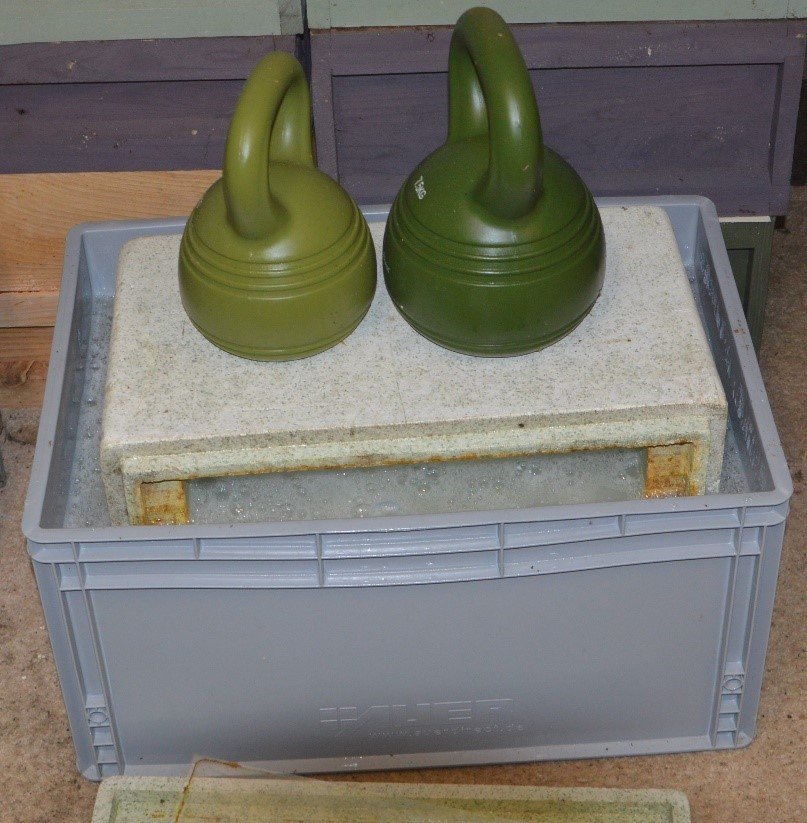
The advice from the National Bee Unit is that a 20-minute exposure to a 0.5% concentration of Sodium hypochlorite kills AFB & EFB spores. I buy the 5L container of strong Domestos, which contains 4.5% of the active ingredient, Sodium hypochlorite. The 5L of Domestos is added to 45L of clean water in the tub and stirred.
Bleach is a skin and eye irritant and is harmful if swallowed, so I wear marigolds and eye protection.
The first time in the solution, the nuc box is submerged feeder side down. It is surprising how much weight is needed to keep the nuc submerged. I find that a 5kg and a 7.5kg weight together is just enough. After 20 minutes the nuc is removed and turned over for a second 20 minute dip. I put the crown board and roof underneath it this time. On the second dip the feeder is at the top. Once the second 20 minutes is complete, the body, crown board and roof are rinsed with water (lightly with a jet waster) and put to one side to drip dry.
Once completely dry and ready for storage the new float is put in the feeder and the clean door is re-fitted.
Cleaning wooden brood bodies
As wooden brood bodies become empty, they are first put on the cleaning table and as much of the physical wax and propolis debris is removed with a scraper. I use an old, sharp chisel, which is cleaned regularly by dipping it in the boiling cleaning soda solution.
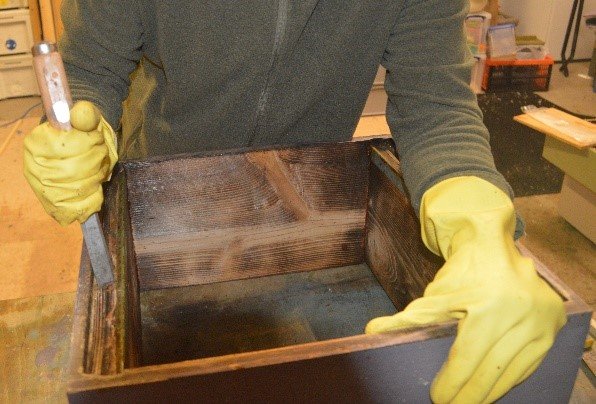
The hardest part of this is removing propolis from behind the runners and around the top and bottom surfaces of the body. Any brace comb comes off easily. The aim is to remove all the debris and have nice clean, smooth surfaces.
Sterilising wooden brood bodies
The body is then scorched. I bought the blow torch kit from Amazon, which included the torch, hose and regulator.
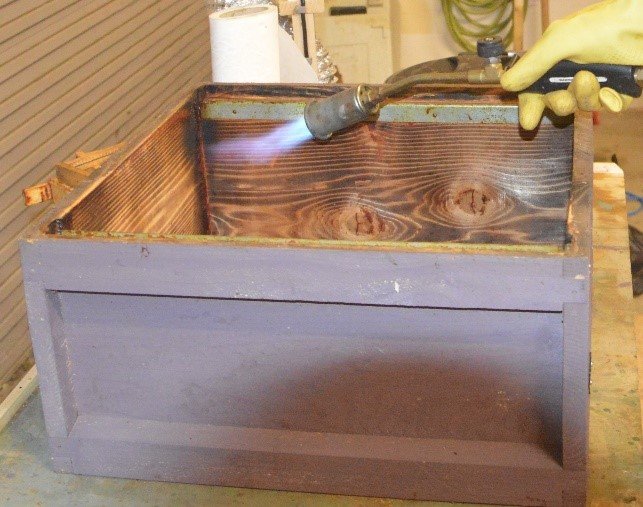
This is a sterilisation process. The purpose of the heat is to kill any pathogens on the surface and embedded into the wood, as well as in any nooks and crannies. All the surfaces are given enough heat to discolour them. The joints, corners and any cracks are given particular attention to get some heat into them, to kill anything lurking inside.
Once the woodwork has been scorched, I rub down the internal surfaces with some rough sandpaper, to remove the thickest areas of any charring. I also take this opportunity to make any woodwork repairs and give them an external coat of paint. I use Cuprinol Shades range on my beehives. It is easy to get and is one of the more bee-friendly paints.
Summary – Cleaning & Sterilisation – Part one
This blog describes a simplified setup for use by small-scale beekeepers with between approximately five and thirty hives. It is based on the advice given by the National Bee Unit in their leaflet “cleaning & sterilisation”.
This blog has covered the equipment used and how to set it up, as well as the cleaning and sterilisation of wooden brood bodies and polystyrene nucs.
Click here to see the next blog in the series. “Cleaning & Sterilisation of equipment for small-scale beekeepers – Part Two – Assessing Brood Frames”.
If you have found this blog useful please share it with others, who may find it interesting. If you would like to receive future posts please register on our home page.
Thank you, Ian, for all the hard work putting all this useful information together, and for sharing it.
Think we need another outing to Netherwhitton for one of you courses Ian?
Brill information, just need to get organised!
You should run a workshop and let us all come over and clean up your equipment under your expert supervision (whilst drinking tea) it could be fun.
Great guide Ian, thanks for putting it up, especially the links to sources for the equipment!